How to Add Stars in Photoshop (Easy Tutorial)
Disclaimer: this post may contain affiliate links, which at no cost to you I may earn a small commission.
Published:
| Updated:
How to Add Stars in Photoshop
If you have been following me on Instagram, you know I love adding in stars on my dusk and night photos. I think it just adds something special to your image. Even though you can’t see the stars in real life sometimes, we know they are there ?. In this easy Photoshop tutorial, I will show you how to add Stars in Photoshop in under 5 simple steps! In the end, you’ll be able to add in stars to all your photos perfect for Instagram.


1. Download A Star Image
If you have your own photo of a starry night use it. But if you don’t it’s okay! I found a high-resolution star image through Google Image Search.
Find a photo of stars that you would like to use.
To find a high-resolution photo in Google Images click Tools -> Size -> Large.
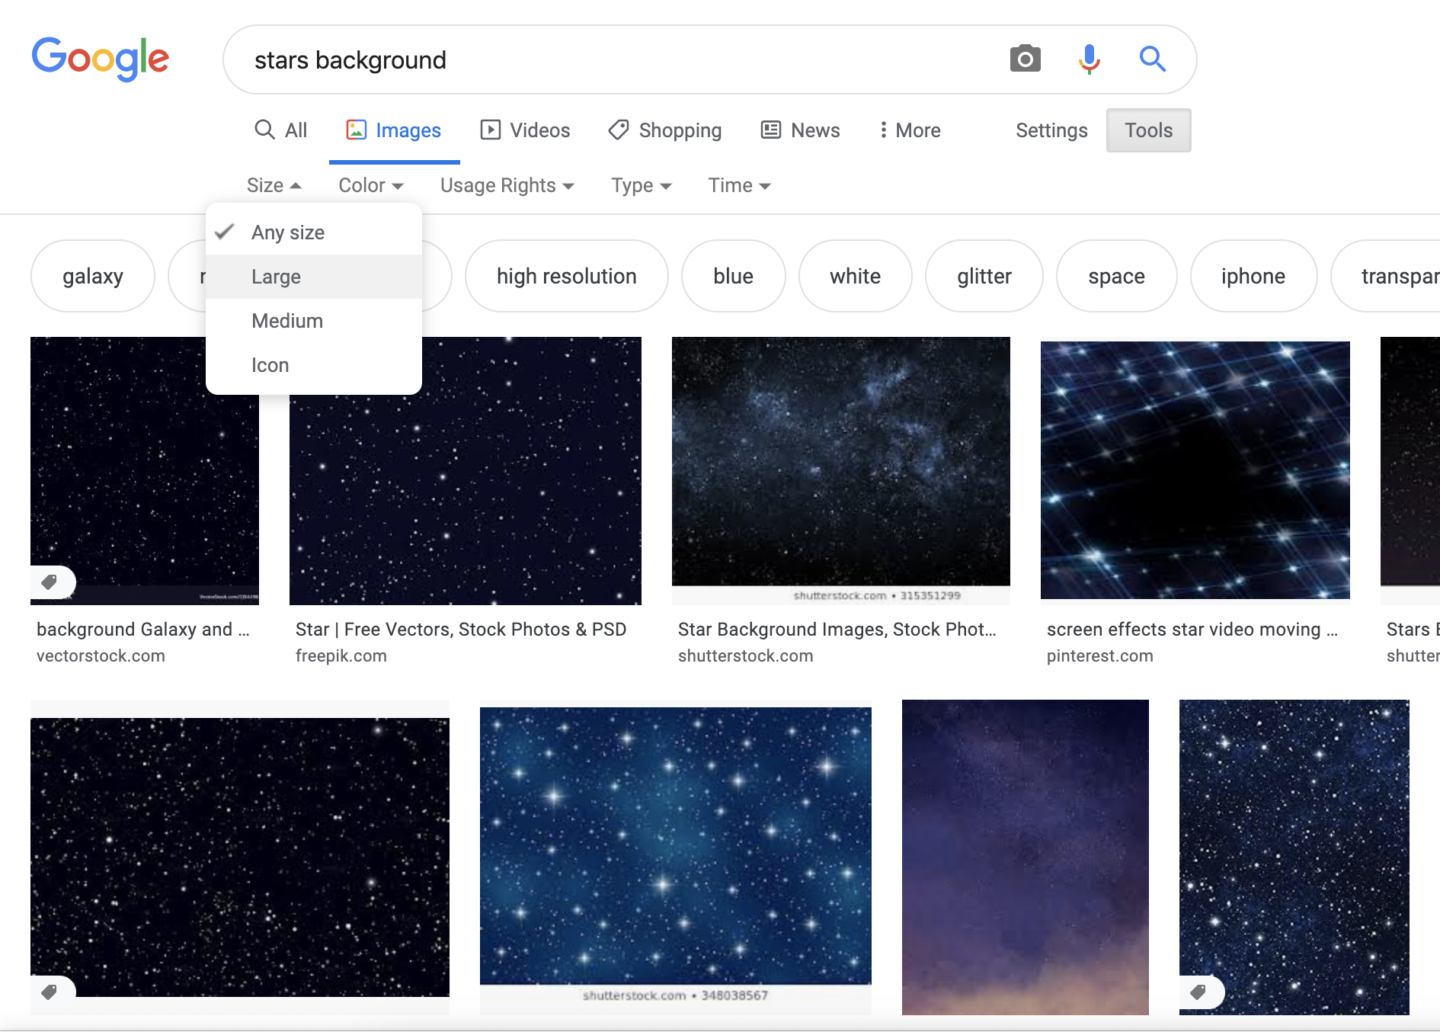
You might have to scroll a while to find one that you like. Ideally, the best image will have a darker background with more realistic stars.
Download your image of choice and save the file with an easy name like “Stars”. You can refer back to this image to add stars even faster.
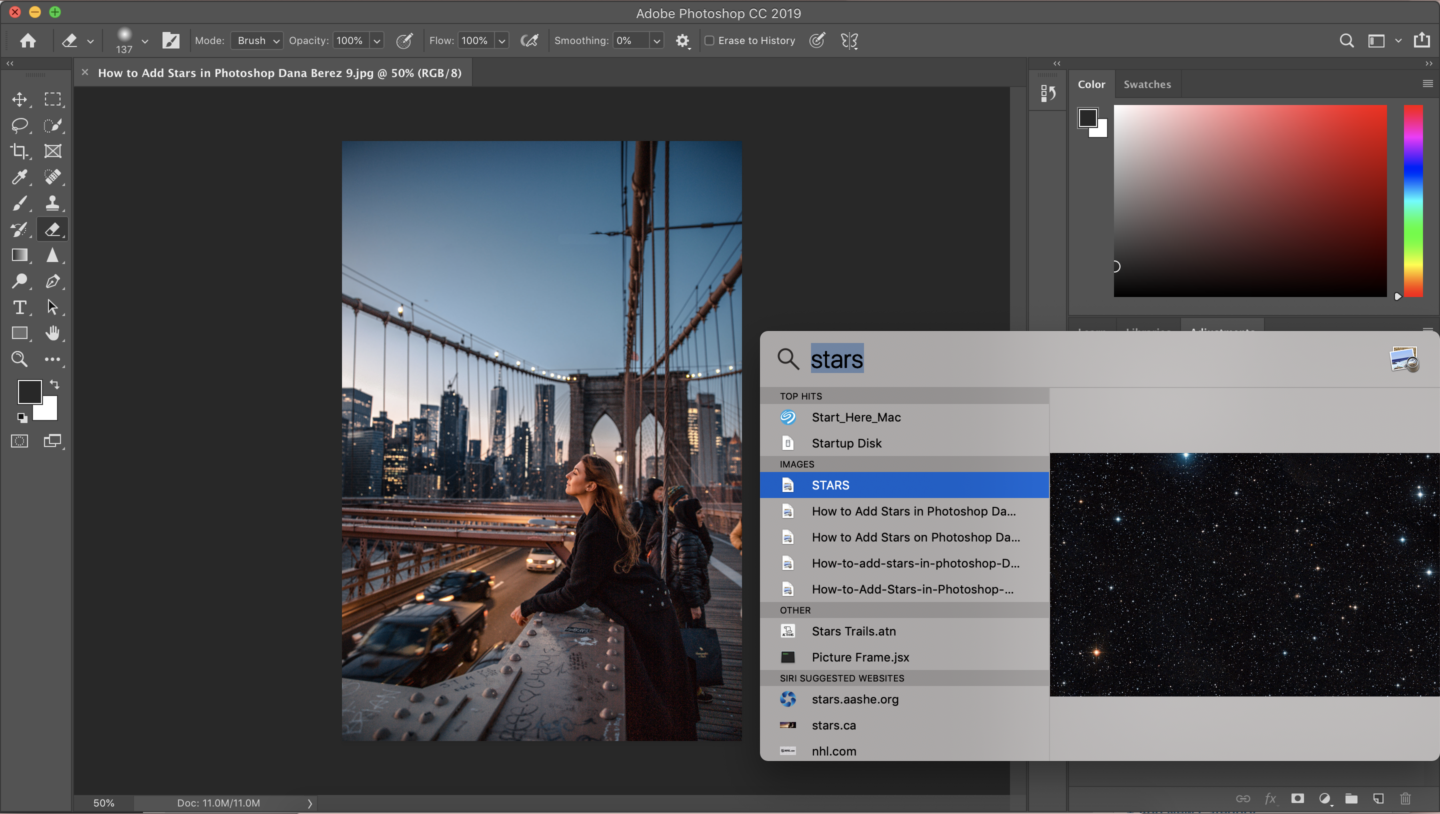
2. Open Image on Photoshop.
Open up the image you would like to add to your stars. Next, find the star image that you just downloaded and insert it on top of your image.
With a Mac, you can search in your Finder the file name of your star image and drag it into photoshop.
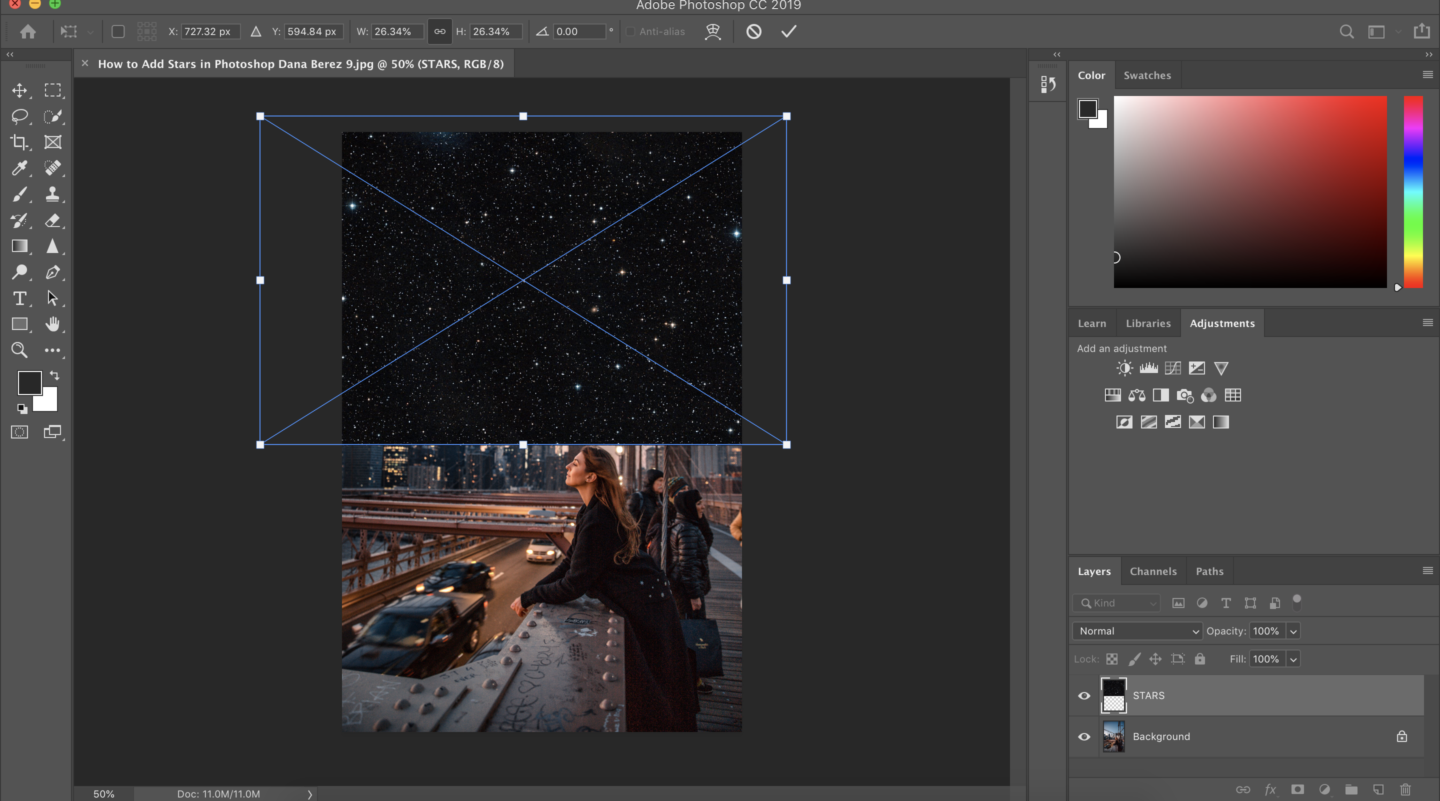
3. Move Image (Command+T)
Next, you will have to move the star image over the area where you would like stars. To do this you have to press ⌘ (command or Control on PC) and T to Transform/ move the image.
In this step, you can also resize your star image. If you’d like the stars bigger, expand your image.
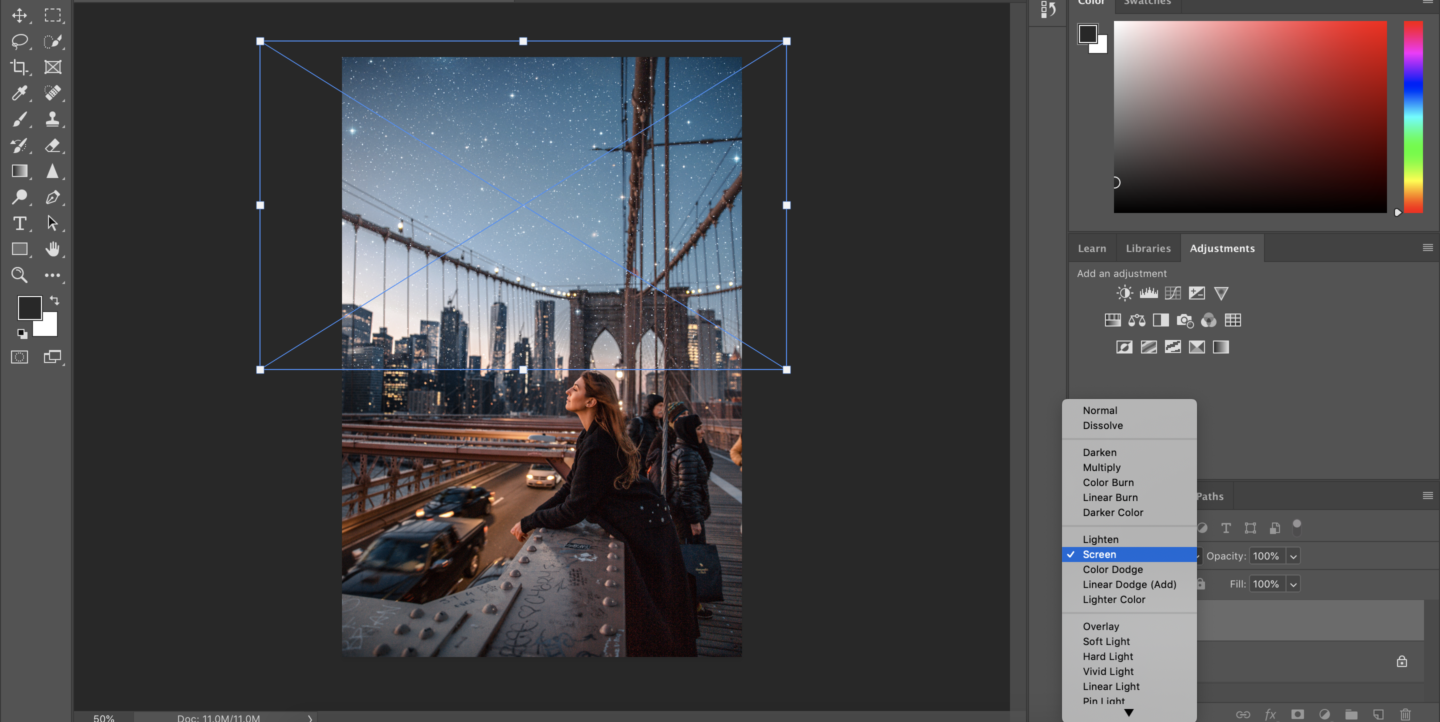
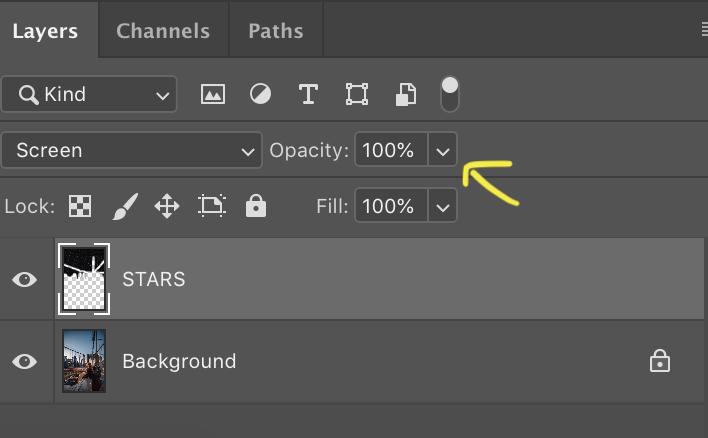
4. Put Star Layer in Screen Mode
This is where the magic happens. By default, your layers will be in Normal mode, but to show the stars in a more natural way, put your Star Layer in Screen Mode.

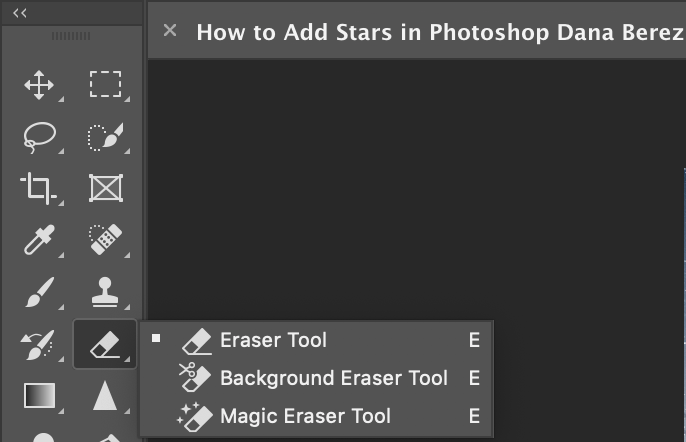
5. Erase Stars You Don’t Want
Once your stars are in Screen mode, there will be some stars you don’t want showing.
All you have to do is click the Eraser tool and erase over the stars you no longer want in the image.
TIP: A quick shortcut to change your brush size on the keyboard is pressing [ and ] keys.
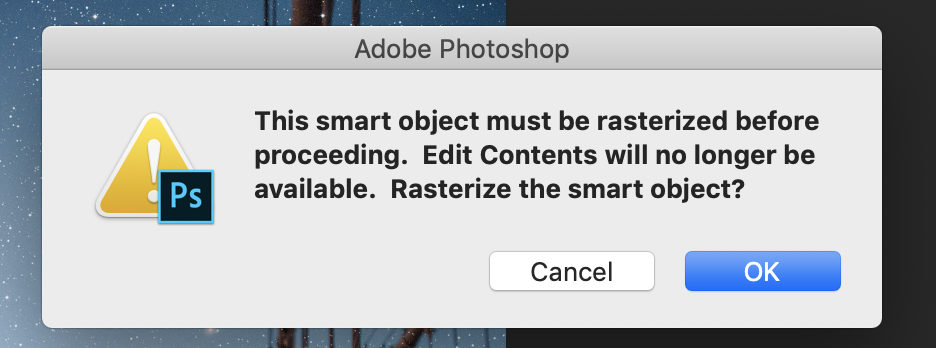
NOTE: I always get this pop-up once I do this if you get the same message just press Okay. Now erase away.
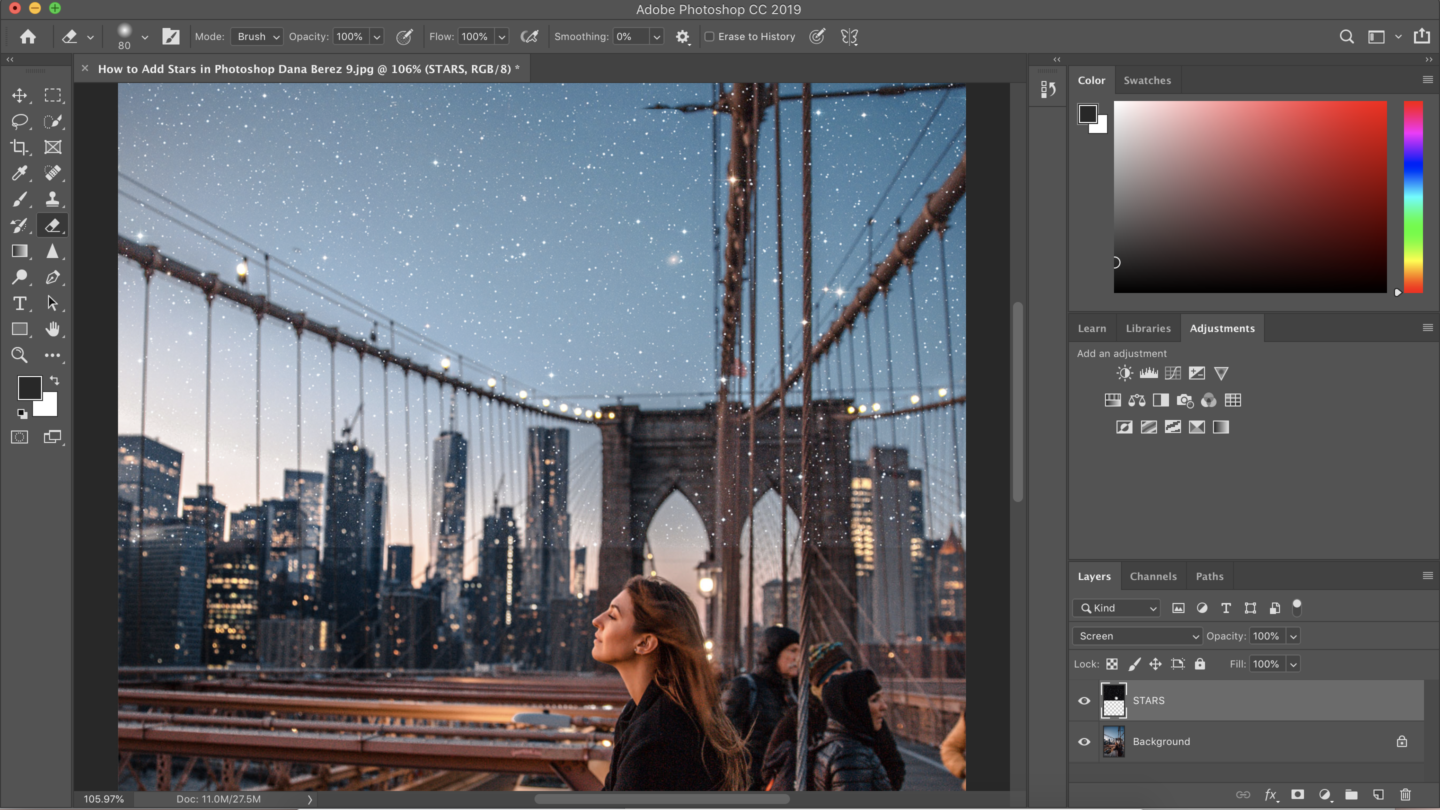
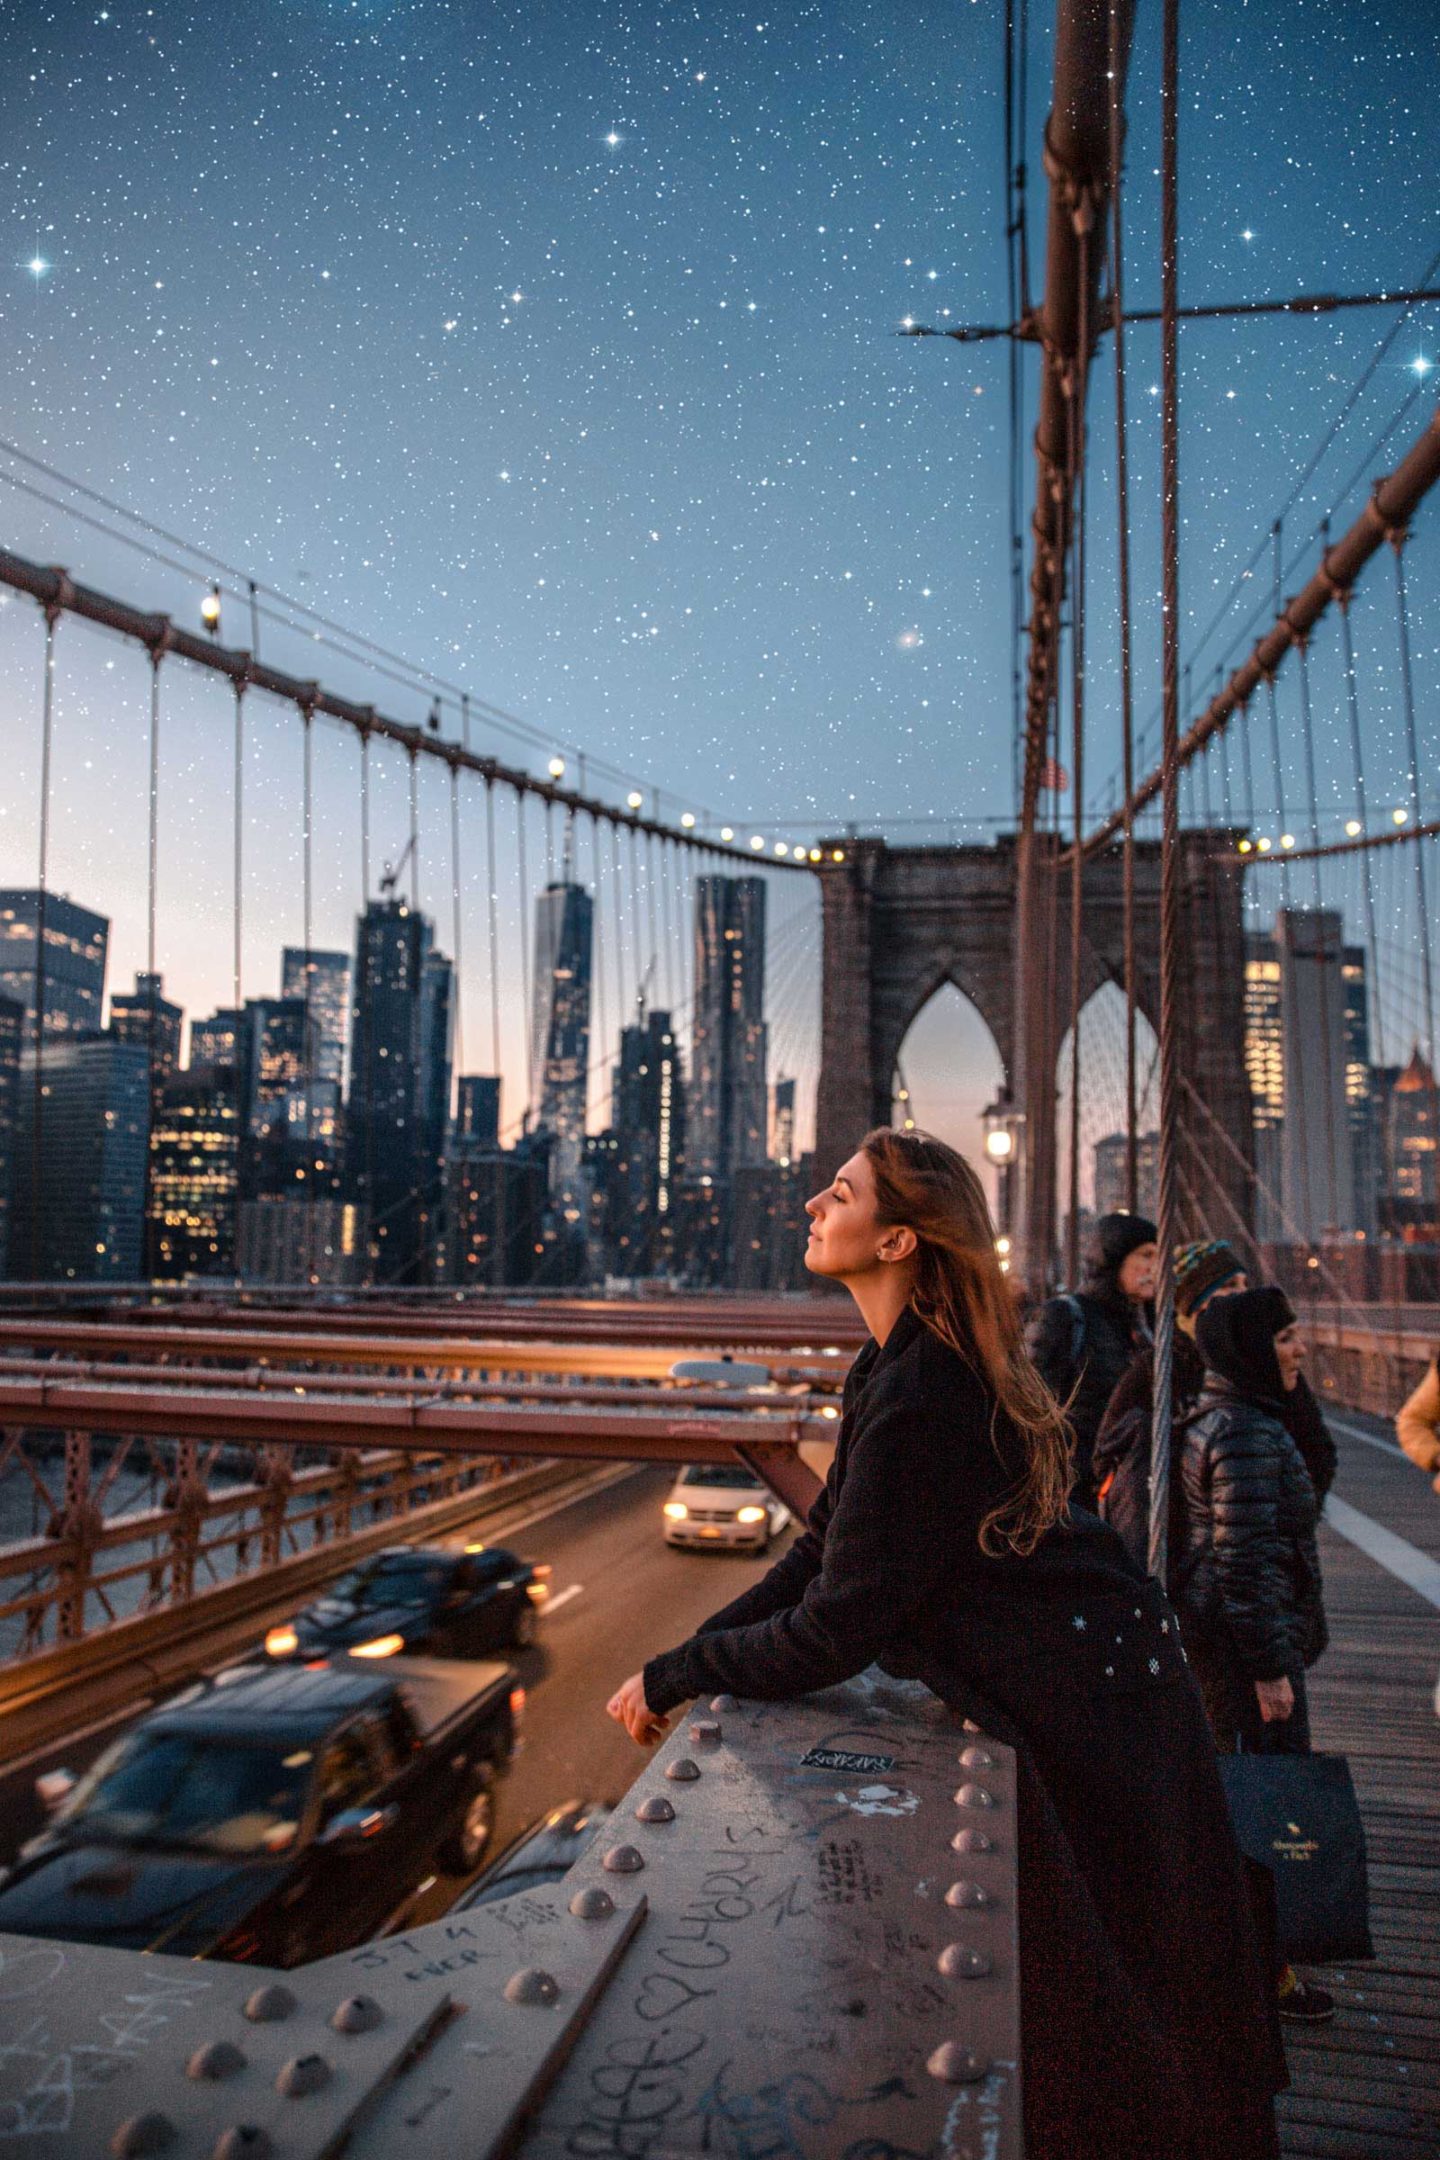
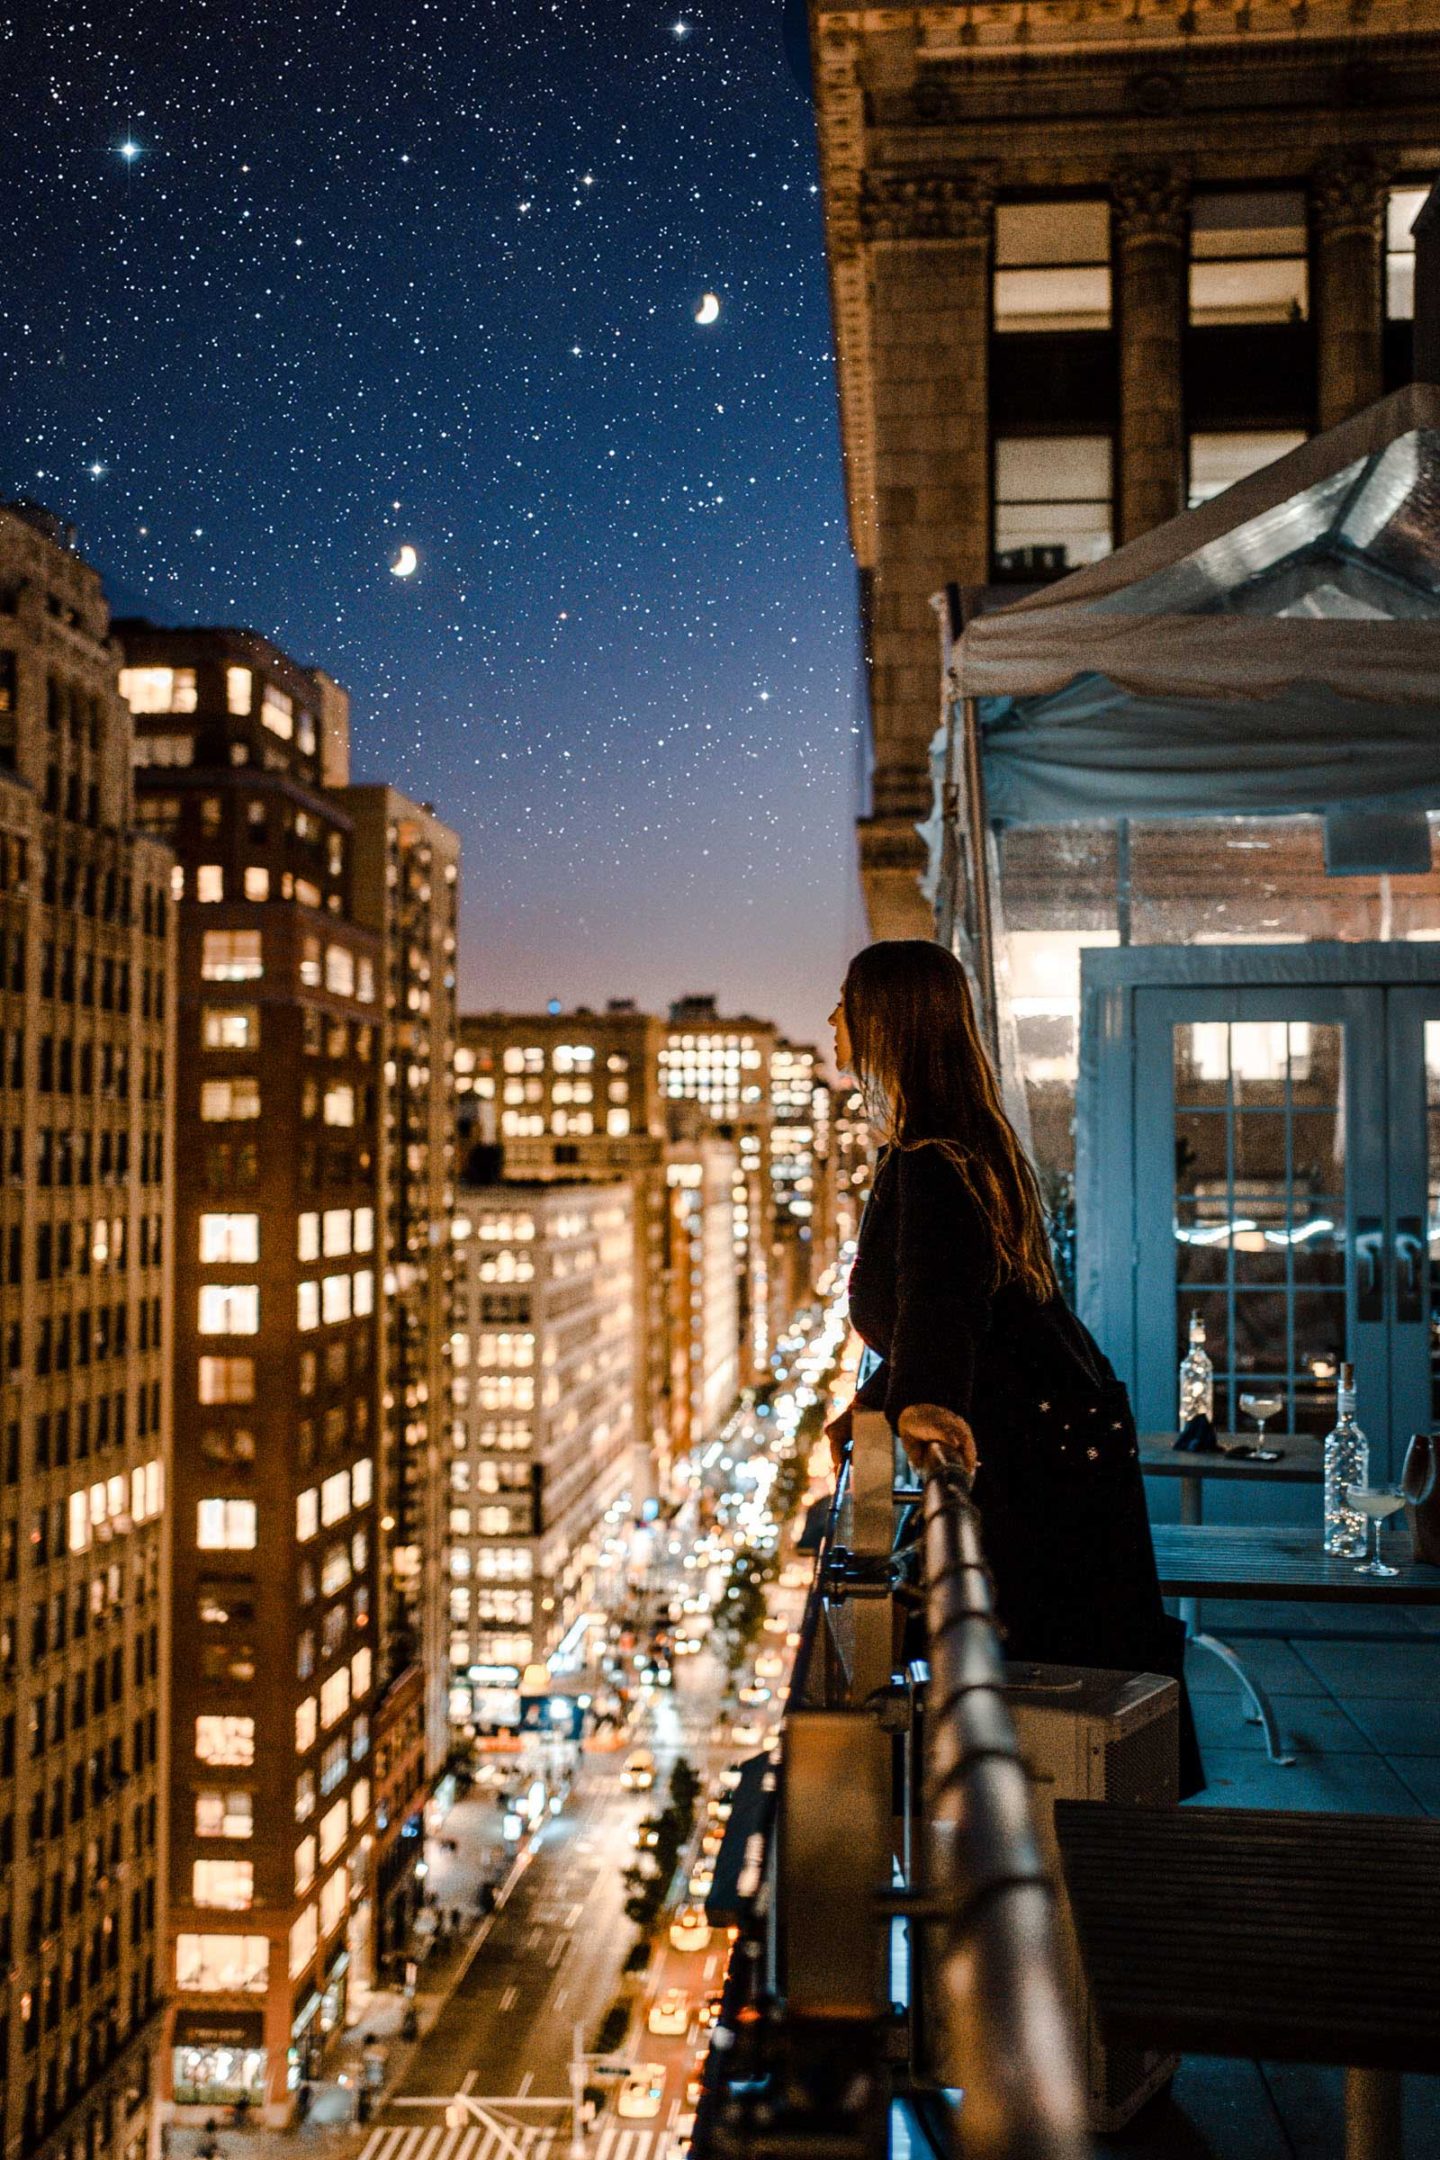
Because some stars were covering the Brooklyn Bridge and skyline, I brushed over those areas with the eraser tool.
The image below shows the final erased effect.

6. Optional: Change Opacity
If your stars are looking too bright for your image, play around with the opacity. I usually leave mine around 80%-100%.
7. Use these same steps for Moons, Suns, ETC!
Now that you have learned how to add stars in your photos, you can use this same method for objects like moons and suns.
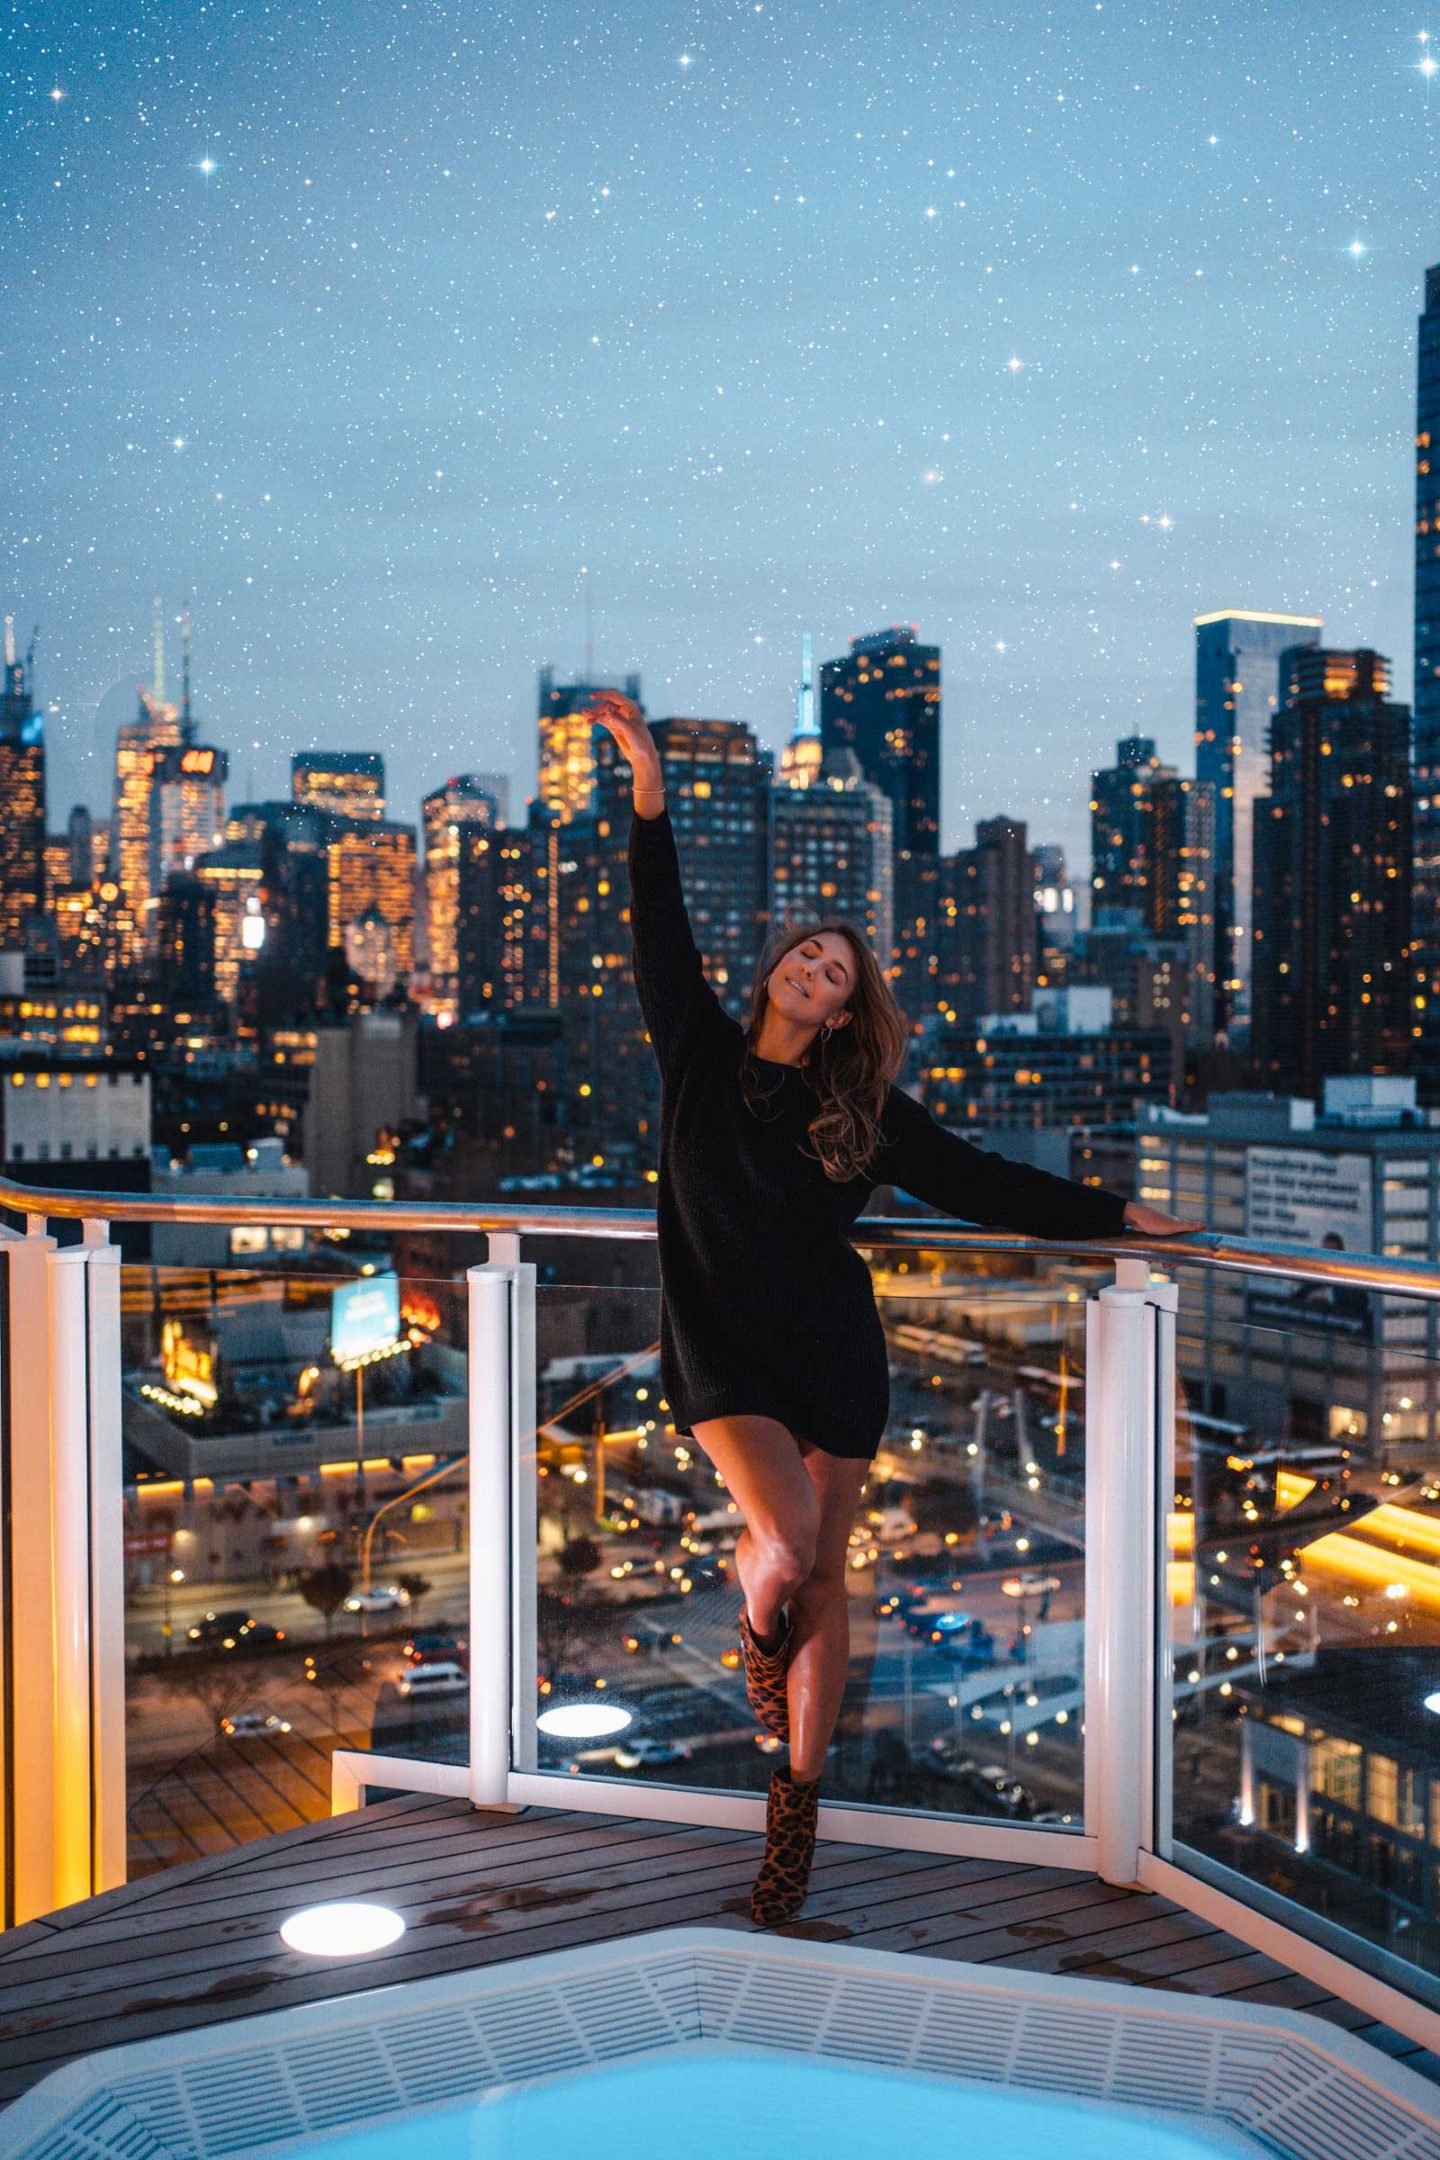
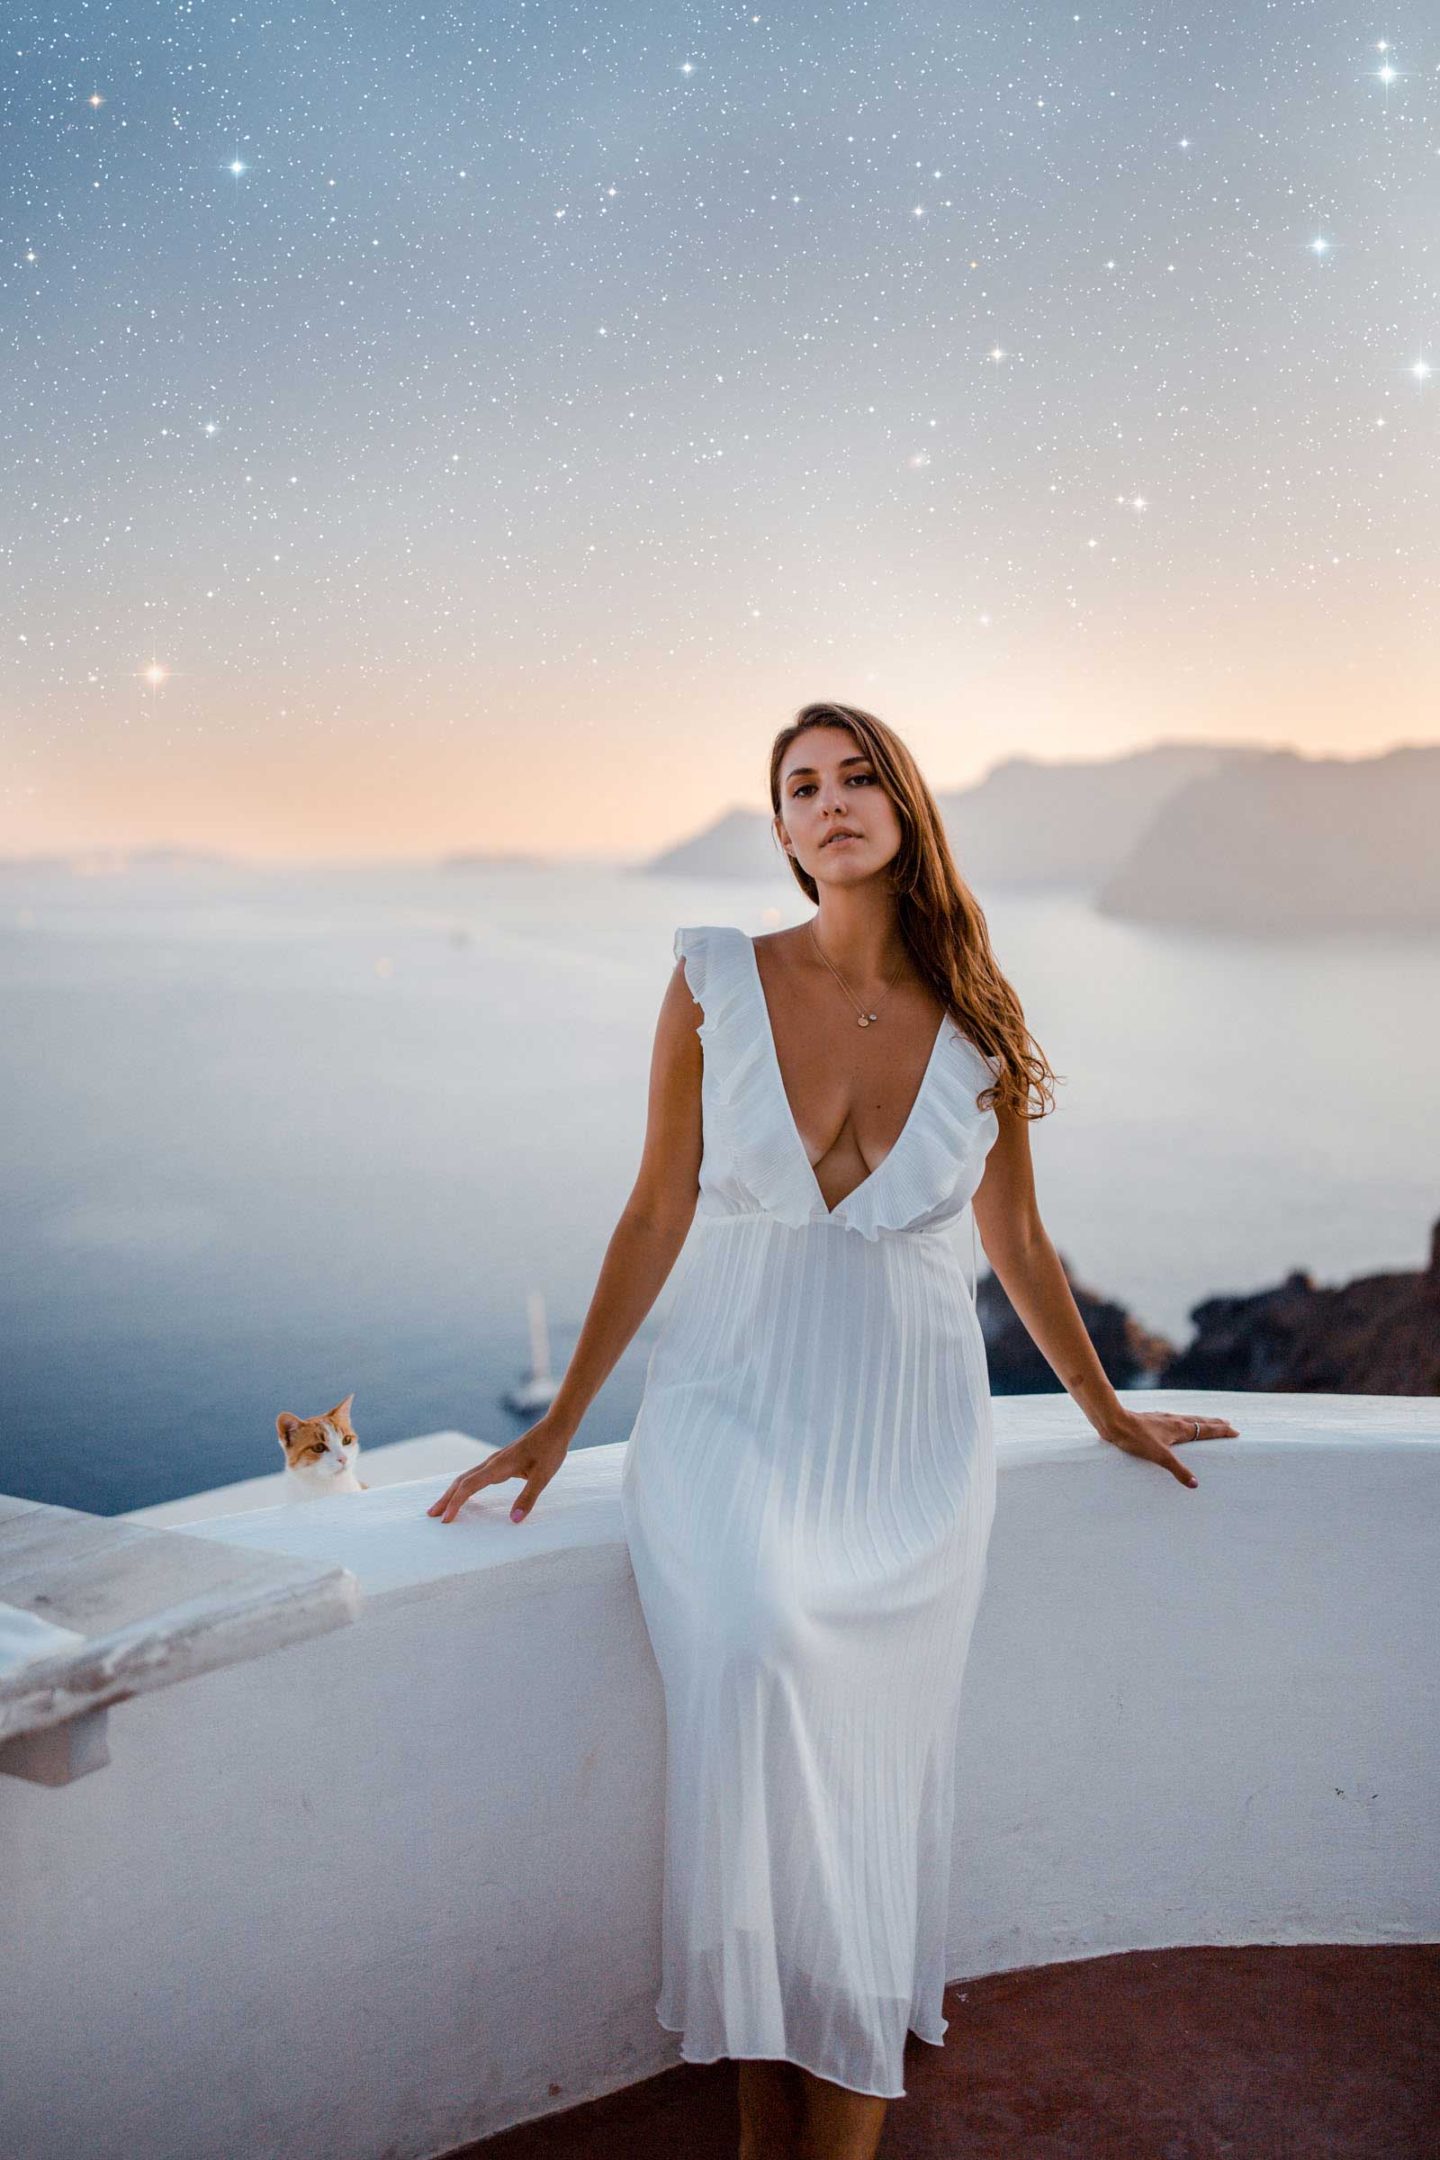
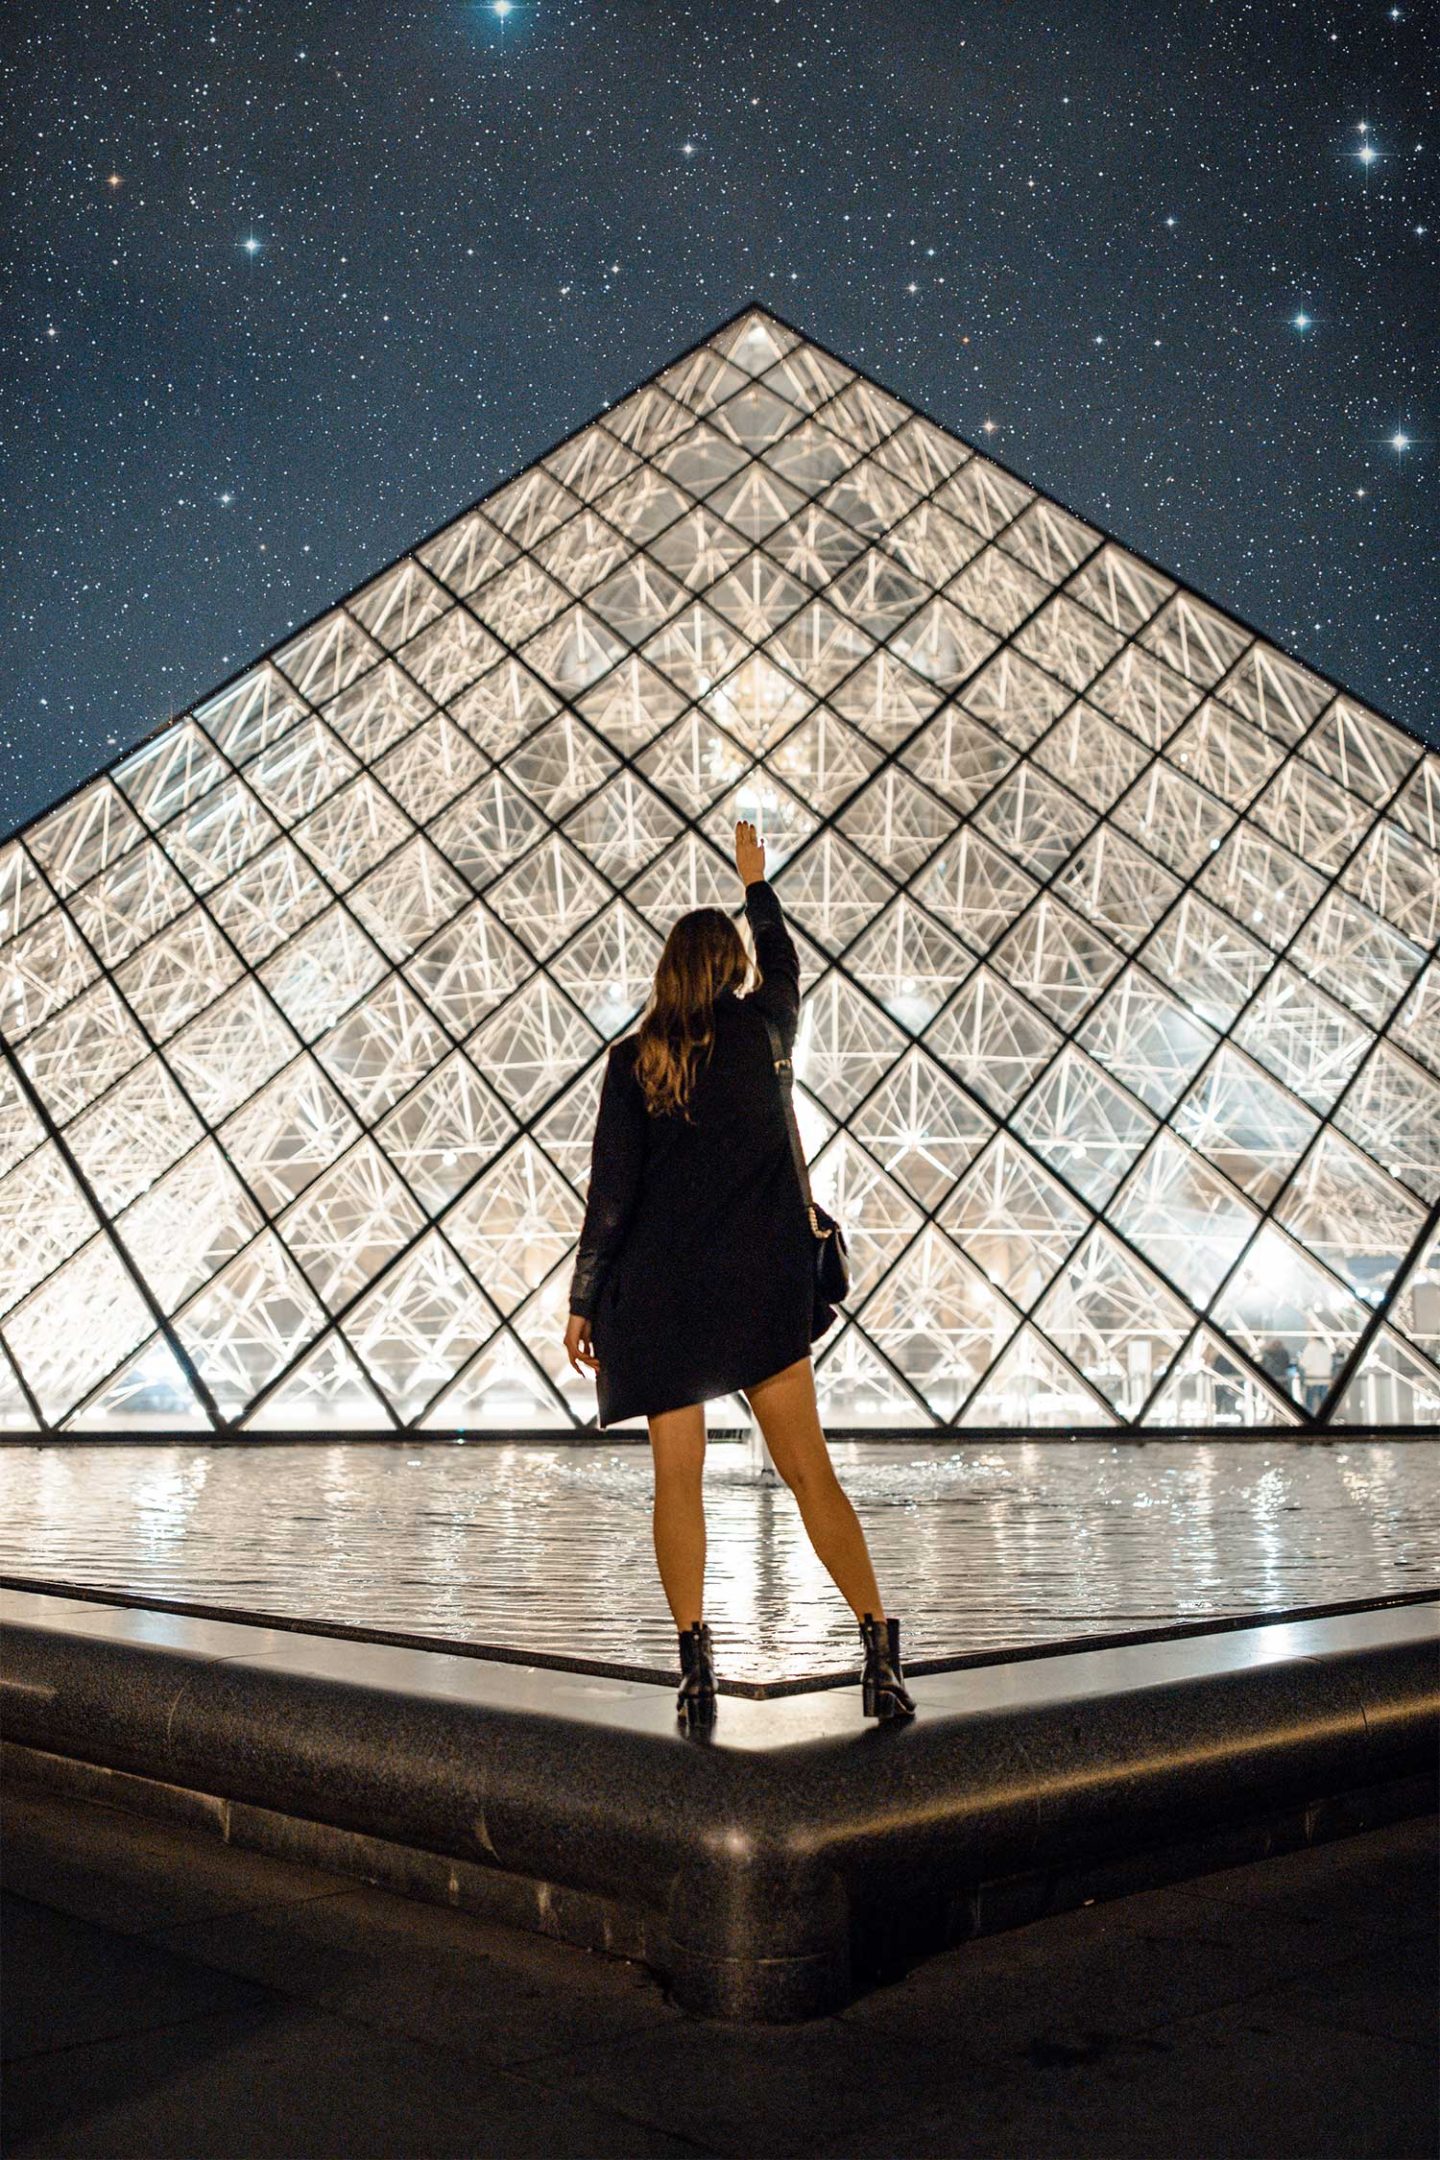
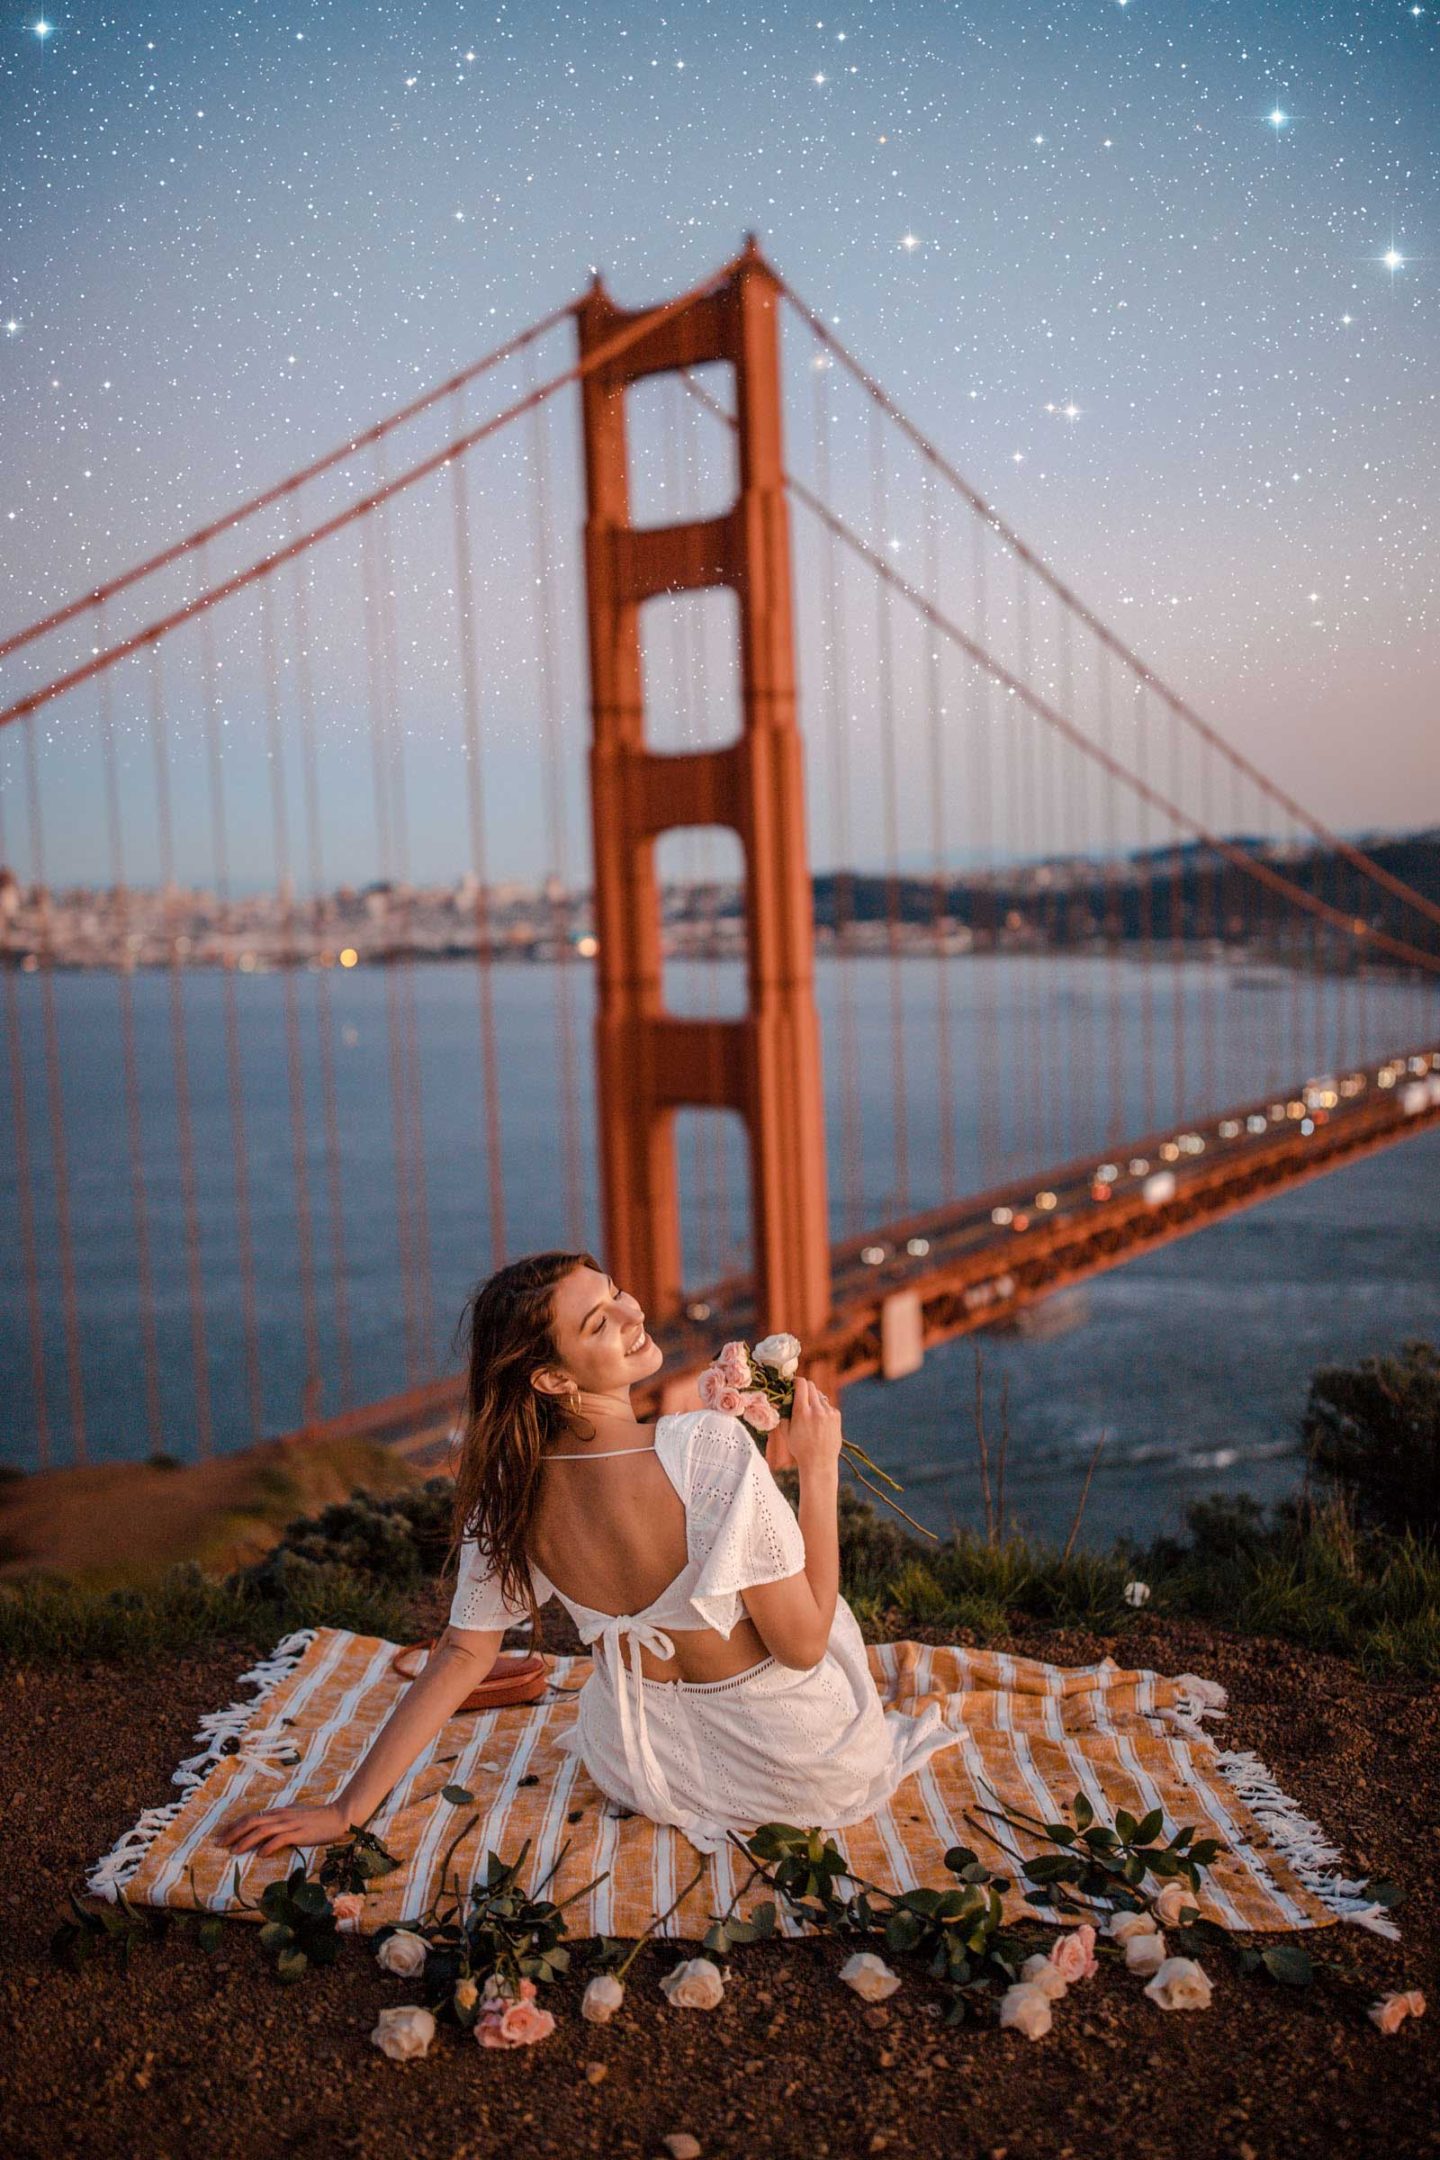
Hope you enjoyed this Tutorial. Here are some of my favorite star photo transformations!
If you enjoyed this How to Add Stars in Photoshop, Pin it to your photography boards. Happy editing!
| Related Post: How to Change Leaf Color in Photoshop: Easy Photoshop Tutorial |

